📨 Introduction

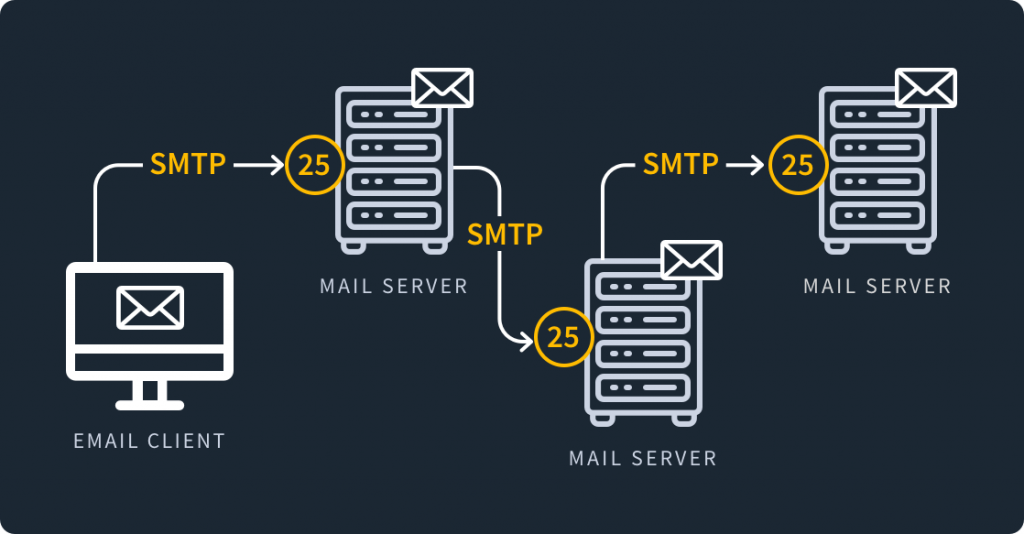
If you’re looking to send bulk emails using Linux servers, you’ve come to the right place! 🚀 Whether you’re running a business, a newsletter, or an email marketing campaign, using a Linux SMTP server with port 25 open can be an efficient and cost-effective solution.
In this guide, we’ll walk you through:
✅ Setting up an email server on Linux
✅ Configuring SMTP for bulk email sending
✅ Best practices to avoid spam filters
✅ Troubleshooting common issues
Let’s get started! 💡
⚡ Step 1: Get a Linux Server with Port 25 Open
Before you can start sending emails, you need a Linux VPS or dedicated server with port 25 open. Many cloud providers block port 25 to prevent spam, so you should choose a provider that allows it.
🔹 Recommended VPS Providers with Open Port 25
1️⃣ DigitalOcean – You need to request port 25 unblocking manually
2️⃣ Linode – Allows port 25 but may require verification
3️⃣ Vultr – May require manual approval for port 25 usage
4️⃣ Contabo – Port 25 is open by default
5️⃣ Hetzner – No restrictions on SMTP ports
If your provider blocks port 25, you can use SMTP relays like Amazon SES, Mailgun, or SendGrid.
🛠 Step 2: Install and Configure an SMTP Server
To send bulk emails, you need an SMTP server. The most popular options are:
📌 Postfix – Lightweight and easy to configure
📌 Exim – Powerful and widely used on cPanel servers
📌 PowerMTA – Best for high-volume email sending (paid)
🔹 Install Postfix (Recommended for Beginners)
Run the following commands to install and configure Postfix:
During installation, select “Internet Site” when prompted. Then, edit the Postfix configuration file:
Add or modify the following lines:
Save and restart Postfix:
✅ Postfix is now installed and ready to send emails!
📩 Step 3: Configure SPF, DKIM, and DMARC for Better Email Deliverability
To avoid your emails landing in spam, you need to set up SPF, DKIM, and DMARC.
🔹 Set Up SPF Record
Add this TXT record to your domain’s DNS settings:
🔹 Set Up DKIM
Install OpenDKIM:
Generate keys:
Add the DKIM public key to your DNS as a TXT record.
🔹 Set Up DMARC
Add this TXT record to your DNS:
✅ Your emails are now authenticated and less likely to go to spam!
📊 Step 4: Test Your Email Server
Send a test email using the following command:
You can also use tools like Mail-Tester (🔗 Check spam score) to verify email deliverability.
🚀 Step 5: Use Bulk Email Software
Now that your server is ready, you need software to send bulk emails. Here are some of the best options:
1️⃣ MailWizz – Paid software with powerful email marketing features
2️⃣ Mautic – Open-source email automation tool
3️⃣ Postal – Free self-hosted mail server
4️⃣ PowerMTA – High-performance commercial SMTP
To install MailWizz, follow their official documentation: 🔗 MailWizz Guide
🛡 Step 6: Avoid Getting Blacklisted
Here are some best practices to ensure your emails are delivered:
✔ Warm up your IP – Start by sending a few emails daily and increase gradually
✔ Use a clean email list – Avoid spam traps and invalid addresses
✔ Enable Unsubscribe Option – This prevents spam complaints
✔ Monitor blacklists – Use 🔗 MXToolBox to check your IP reputation
📢 Conclusion
Setting up a bulk email server on Linux requires proper configuration, authentication, and best practices to ensure good email deliverability. By following this guide, you can successfully send bulk emails using Linux without landing in spam!
If you found this guide useful, share it with others who need a reliable email marketing solution! 🚀
